Monday, June 9, 2014

Skewer Me?

I have grilling fever.  My backyard is a peaceful haven these days.   Why not try something different and new?  Why buy those over priced ones they put together at the grocery store? Let's do kabobs!
Shish Kabob - It is a dish consisting of meat threaded on a skewer and grilled. Any kind of meat may be used; cubes of fruit or vegetables are often threaded on the spit as well. Typical vegetables include tomato, bell pepper, onions, and mushrooms. In the USA, the word "kebob" usually refers to shish kebab. 
Tasty stuff if you ask me! I first started playing around with kabobs about five years ago.  My favorite is probable chicken or pork with pineapple.  Fairly healthy too.  I usually serve on a bed of rice or couscous and additional grilled vegetables. A side salad works well too.  You can totally do desert ones as well...pineapple, plums, and bananas on a skewer, grilled, brushed with coconut milk, then served just as they are or with ice cream/sorbet: Delicious! 


J.J.'s Pirate Marinade
  • ¼ cup dark spiced rum
  • ¼ cup pineapple juice
  • ¼ cup olive oil
  • ½ cup coconut water
  • 1 lime juiced – zest for extra punch
  • 2 tablespoons honey
  • ¼ teaspoon of cyan pepper
  • 2 cloves garlic minced
  • ¼ teaspoon cracked black pepper
  • ¼ teaspoon Sea Salt
Whisk all ingredients together till well blended. Works great for chicken and pork. Untested with seafood and beef. Let meat sit in marinade for at least 30 minutes or longer for best results. 

June is Pride month.  Here is one in honor of Pride and some of my very good friends!  This easily doubles or triplesfor any gathering.

Rainbow Chicken Kabobs 

Ingredients
  • 1 lb. boneless skinless chicken breasts, cut into 1-1/2 inch pieces
  • 1 each red, yellow and green pepper, cut into 1-1/2 inch pieces
  • 1/2 cup J.J.'s Pirate Marinade, divided
Directions
  1. Thread chicken and peppers alternately onto 4 skewers; brush with 1/4 cup marinade or place in zipper bag to soak, placing back in a pan in case of leaks.
  2. Refrigerate 1 hour.
  3. Heat grill to medium heat. Grill kabobs 12 to 15 min. or until chicken is done, turning and brushing occasionally with remaining marinade.
Grilled Rainbow Pork Kabobs

Prepare as directed, substituting pork loin for the chicken, and pineapple, red onion wedges in addition to the pepper pieces, and increasing the grilling time to 20 min. or until meat is done.

If using wooden skewers, soak skewers in water for 30 minutes before using to assemble kabobs to prevent them from catching fire on the grill.

Teriyaki Bacon Wrapped Chicken Kabobs
No bacon in the house...what is wrong with me?
  • 2 pounds boneless skinless chicken breasts
  • 1 pound halved bacon slices
  • 1 large pineapple, peeled, cored, and cut into 1-inch cubes
  • 1 cup low sodium teriyaki sauce
  • Oil for grill grate


Directions
  1. Cut chicken into 1-inch cubes.
  2. Wrap each piece of chicken with 1/2 a slice of bacon.
  3. Thread bacon-wrapped chicken on skewers, alternating with pineapple cubes.
  4. Clean and oil the grilling grate. I use Pam for Grilling!
  5. Grill skewers until bacon has browned and crisped and chicken has cooked through, 3-6 minutes per side.
  6. In the last minutes of cooking, brush each skewer with teriyaki sauce all over.
  7. Remove to a platter, let rest for 5 minutes
  8. Serve immediately with remaining teriyaki sauce.
Seafood strike your fancy? Try this! Easily sub scallops in place of shrimp.

Shrimp Kabobs

Ingredients
  • 2 red potatoes
  • 4 (6 inch) skewers
  • 16 large shrimp, peeled and deveined
  • 1 large red onion, cut into large chunks
  • 1 large tomato, cut into large chunks or use cherry tomatoes
  • 1/4 cup extra-virgin olive oil
  • 1 teaspoon salt
  • 1 teaspoon ground black pepper
Directions
  1. Preheat grill for medium heat and lightly oil the grate.
  2. Place potatoes into a large pot and cover with salted water; bring to a boil. Reduce heat to medium-low and simmer until nearly tender, about 10 minutes. Drain and cut in quarters.
  3. Thread 4 shrimp onto skewers, piercing each shrimp near the head and tail, alternating with potato, onion, and tomato chunks; repeat with remaining skewers. Arrange skewers on a platter and coat with olive oil. Season with salt and black pepper.
  4. Cook skewers on preheated grill until shrimp are bright pink on the outside and the meat is no longer transparent in the center, about 10 minutes
  5. Serves 4 or 2 really hungry people.

Print Friendly and PDF

Monday, June 2, 2014

Chill About Grilling! More Handy Grilling Tips

Gas or charcoal? Charcoal or gas? Charcoal probably gives your food a better flavor. But gas... it's just so easy and when you are in a hurry, gas heats up fast. I have a gas grill...a beautiful, sexy gas grill. Still, charcoal grills aren't that hard to get going. Have a cold drink. It'll be ready soon. I would like to add a small charcoal grill to my backyard collection.

You can grill just about anything over direct heat...right above the coals or the flame, but sometimes, indirect grilling is better. Large/thick cuts of meat, whole chickens, anything dripping with fat — for these, shove all the coals to one side of the charcoal grill and use the opposite side, or, on a gas grill, use less flame and don't cook the food directly over it.

A covered grill is a hotter grill. Food cooked in a covered grill tastes smokier. This is usually a good thing, but not always. Also, it's easier to overcook food when the grill is covered. Why? Because you can't see the food.

"Barbecuing" usually refers to cooking big things like pork butt, beef brisket, and whole hogs over low heat for a long time. Grilling hamburgers is not barbecuing. That's grilling.

This is my sexy grill!
A good way to oil your grill's grid before using: Chop an onion in half, dip the cut side in vegetable oil, and rub it all over the grid.

To clean your grill grate, use a little soapy water at the beginning of the season. Then hit it with a wire brush, when it's still warm, after each use. That's it.

To test food for doneness, a cake tester or metal skewer can make you look like a genius. Stick it into the middle of whatever meat you're grilling, then hold it to your chin. If it's cool, keep cooking. If it's warm, you're at medium-rare. If it's pretty hot, yank the food off the grill. Careful with tongs. Squeeze too tight and you squeeze the juice out. Same goes for maneuvering using a fork or knife.

Gadgets: Baskets, toppers, rib racks, vegetable holders, drip pans...all good tools, though not all essential. Save money, only buy what you'll use. The basics are a good pair of tongs, a spatula, and a wire brush. A pot holder is not the same thing as a grilling mitt. Pot holders are for ovens.

A cool gadget for charcoal grills: the electric charcoal igniter. You plug it in, set it in the grill, top it with charcoal, and within about eight minutes the coals will be on their way to readiness. No lighter fluid needed. But nothing beats the chimney starter.

Charcoal is ready when 80% of the coals are ash-gray. If the fire gets too cool (you can hold your hand just above the grill for four or five seconds), try pushing the coals closer together. If it's too hot (two seconds, max), spread the coals out and move your food to the edge. If the coals start to burn down and disappear, add more — but remember, that brings the temperature down, too.

You can put barbecue sauce on just about anything. Remember, only do so in the last ten or fifteen minutes of cooking...the sugar in the sauce can burn.

Strawberry BBQ Sauce
  • 1 cup Strawberry Puree
  • 2 T apple cider vinegar
  • 2 T brown sugar
  • 1 T Worcestershire sauce
  • 1/4 tsp lemon zest
  • 1 tsp paprika
  • 1 tsp onion powder
  • 1/2 tsp cinnamon
  • 1/2 tsp garlic powder
  • 1/4 tsp dry mustard
  • 1/4 tsp allspice
  1. Season to taste (3/4 tsp salt and 1/2 tsp white pepper)
  2. In a small saucepan, over med heat bring above ingredients to a simmer. 
  3. Then reduce to low and simmer for about 30 minutes.
Makes 1/2 Cup

Add just about anything to mayonnaise for a sauce or a spread. Hot sauce, lime zest, basil, mustard, A1, or whatever. It's hard not to make it taste good. An interesting steak sauce: Dijon mustard, melted butter, and Worcestershire.

The basic marinade: an oil (olive, canola, grape seed, etc.), an acid (vinegar, lime juice, yogurt, wine, etc.), herbs, and spices. Experiment. And a smashed garlic clove never hurts. Don't feel like making your own? Italian or balsamic dressing works great.

If you forgot to make a marinade...food has to sit in the marinade for a few hours to, you know, marinate...make a rub real fast. About a half-hour before grilling (or even at the last second), massage it into the meat. Use what you like; pepper, cinnamon, dried herbs, cayenne, chili powder, brown sugar, cumin, paprika...

The Ziplock bags were made for marinating (not really but it sounded good, but they do work great.) Basting meat with leftover marinade during cooking is a good idea. Using leftover marinade as a finishing sauce is not. Because of the raw-meat juice, of course.

Always salt beef a good half-hour before grilling. You're not flavoring. You're tenderizing, and tenderizing takes time.

Don't over mix or manhandle your burgers. You want them just barely formed into a patty. Otherwise, the meat will get tough. Please don't press the burgers down with a spatula as they cook, unless you like a dry hamburger. When to add the cheese: After flipping (obviously), a minute or two before the second side is done. Then close the cover.

To grill fresh sausage: First, precook it by poking it with a fork and simmering it in water until just about cooked, ten minutes tops. Then grill it till it's browned and a little bubbly, probably five minutes.

The kebab was a wonderful invention. It's like a whole meal on a stick. A kebab secret: If you want the meat medium-rare, pack it tight on the skewer. For medium-well, space the pieces out. Don't forget that skewers get hot!

One inch is the best thickness for a steak (including fish steaks) or pork chop. It's the easiest to get a nice exterior crust and a juicy middle. That goes for lamb chops, too, if that’s your thing. A little olive oil, salt, and pepper, and throw it on over high heat.

Chicken is tricky. It dries out, it burns, it's susceptible to slight differences in grill temperature. If you have a bunch of chicken pieces on the grill, flip them frequently and move them around the grill a lot according to which pieces are cooking fastest and where the grill is the hottest.

Don't forget about vegetables. Toss some thin asparagus with olive oil, salt, and pepper, throw it on, and it'll be done before you can grab another beer. Delicious. Wrap small vegetables in a foil packet and rest it over high heat. Poke a few holes in the foil to let the smoky flavor in. Slice zucchini and yellow squash long ways, brush with olive oil, season, then throw on the grill. When it comes off, hit it with a sprinkle of Parmesan cheese...YUM.   It's the only way I will eat zucchini.  

There is no fruit you can't grill (I don't think). Pineapples, bananas, plums, cantaloupe, oranges, peaches sliced or cut in half, brush with melted butter and if you want, brown sugar, and grill. There are few tastier desserts than grilled fruit, and somehow, it always surprises people.
Print Friendly and PDF

Monday, March 24, 2014

Let's do brunch!

I've got to spend a glorious weekend at home this past weekend...mostly because the significant other and I have been very ill with some creepy crud the takes over your sense of smell/taste to play a horrible game of keep away.  Very awful! Saturday we were feeling well enough to have some real food so I started concocting us a very delicious brunch of bacon, eggs, mashed potato pancakes (A great recipe to use leftover mashed potatoes!), and English muffins.  Nothing special, but very good because we could smell and taste it. Brunch is so under rated!

Sunday morning, I woke up at a very ungodly hour and couldn't go back to sleep, so I started
planning our brunch in my head...because this is how my mind works at 4:00am on a Sunday morning.   We both like quiche, but a big one kind of goes to waste before we can finish it because it's just the two of us.  I devised the recipe that follows for a quiche for two.  I must say with delicious results. I served it with a mashed potato pancake, a chocolate chip pecan scones, and orange wedges for color.

 Also...I am sure you can fill this with any quiche filling you find yummy.  This is just what we had on hand. 

J.J.'s Quiche for Two

Ingredients

  • 2 large eggs
  • ¼ Swiss cheese, shredded
  • 10 baby spinach leaves
  • 2 slices Canadian bacon, chopped
  • ½ pie crust
  • Tablespoon milk
  • 2 pats of butter
  • Salt/pepper/seasoning of your choice

Directions

  1. Cut pie crust in rounds to fit your cooking vessel. We have these cool mini pie pans I like to use.
  2. Butter your cooking vessel.
  3. Place pie crust in vessel...making sure it is in full contact with the pan.
  4. Divide the Swiss equally between both pie shells...reserving a couple pinches to place on top.
  5. In a bowl, scramble eggs with milk and seasoning.
  6. Divide egg mixture between both pie shells.
  7. Add 3 of the spinach leaves to EACH pan.
  8. Add Canadian bacon to both pans.
  9. Top with remaining spinach and cheese.
  10. Bake in 350 oven for about 20 minutes...different ovens may vary. 

Grandma's Mashed Potato Cakes

Ingredients

  • 2 cups mashed potatoes
  • 1 large egg
  • 3 tablespoons finely diced onion
  • Black Pepper
  • 2 tablespoons of flour
  • splash of milk – this varies depending on how stiff the mixture is
  • Cooking spray

Directions

  1. Combine all ingredients till makes a batter the consistency of pudding...you may have to add more flour or milk depending on your mashed potatoes.
  2. Cook on medium heat in a non stick pan, coated in cooking spray a heaping tablespoon at a time.
  3. Once flipped, flatten into a cake.
  4. Cook time varies depending on how crisp you want them.
  5. Serve warm as a delicious side to a breakfast, brunch, or even dinner.

Rosy's Chocolate Chip Pecan Scones

Ingredients

  • 1 ¼ cups all-purpose flour
  • 1/8 -1/4 cup sugar depending on how sweet you want them
  • 1 ½ teaspoons double-acting baking powder
  • ¼ cup mini chocolate chips
  • ¼ cup chopped pecans
  • 4-ounces sour cream
  • 2 ½ tablespoons stick margarine or butter
  • Baking Sugar to garnish

Directions

  1. Preheat the oven to 450 degrees F.
  2. In a large mixing bowl, add in the flour, sugar and baking powder. Mix in the chocolate chips and walnuts.
  3. Create a hole in the middle of the bowl, pushing the dry ingredients to the sides. Pour the sour cream into the hole and crumble the margarine in with your fingers as well. Mix everything together with a big spoon until the dry ingredients absorb all of the sour cream and margarine. Continue to knead the dough with your fingers until the consistency is uniform.
  4. Sprinkle a small amount of flour on top of a baking sheet. 
  5. Take the dough mixture out of the bowl and place it in a circular mound on top of the baking sheet. 
  6. Cut the dough with a knife into 8 pieces by making a plus sign, and then a multiply sign. Make sure to separate all 8 wedges of dough to allow room for each piece to expand in the oven without touching. 
  7. Sprinkle with Baking Sugar. Bake until very lightly browned, 10 to 15 minutes
Print Friendly and PDF

Friday, March 21, 2014

Why is there a chip on your shoulder? Miss your mouth?

Last Friday was National Potato Chip Day! Yum!  In honor of that, today's post is all about...you guessed it! Potato Chips!!!

I grew up in a small town in Southeastern Indiana about thirty minutes from Cincinnati Ohio.  When I was a kid, I had no clue so well loved brands were regional.  I grew up with bands like Mike-Sells,
Grippo's, and Husman's.

My Grandmother was a huge fan of Mike-Sells.   When I was very young, I always remember having that familiar red and silver foil bag in the house.   I am not a huge fan of their plain chips...the rippled or as they call them "groovy"ones are so good for dips.  I have shared many a bag of Mike-Sells groovy chips and some sort of onion dip with my Mom over the years. 


As I got older and developed my own tastes...I fell in love with BBQ chips.  There are so many kinds, but there is still only one today that I crave, beg people to mail me, and will order on-line despite ridiculous shipping charges: Grippo's BBQ.  They are sweet and smokey, yet after you swallow them, it hits you with a bit of heat that I find delightful.  I have requested these chips for birthday presents, holiday's, and just because.  I look forward to having them as a snack almost as I look forward to my visit to Skyline Chili when I go back home to visit. Grippo's also has this flavor that is my second favorite called Sweet Bermuda Onion. 

I personally never cared much for Husman's.   They always seemed to leave a coating in my mouth.  A few years back long before I moved to the East Coast, Husman's had out Montgomery Inn and Cincinnati Chili flavor's that were pretty good. 

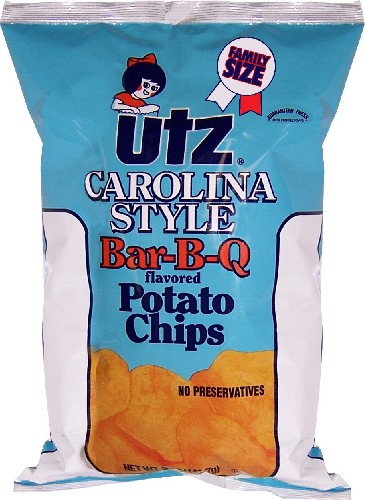
I have lived in a couple places on the East Coast the last few years and the brand here seems to be Utz.  There is also Cape Cod up in Massachusetts, but they seem to be getting more and more national.  As for the Utz chips...my favorite is the Carolina BBQ flavor.  The are kinda acidic like a salt and vinegar chip, but have a hint of spice.  That is something very tasty with a sandwich. 

Now that I am done babbling about potato chips...how about a recipe to use some!

J.J.'s Potato Chip Chicken


Ingredients

  • 4 cups favorite flavor of potato chips, crushed (1 cup)
  • 1 large egg
  • 1/2 teaspoon black pepper
  • 1 teaspoon of Complete Seasoning or favrite seasonal of your choice
  • 1 teaspoons Worcestershire sauce
  • 1 tablespoons vegetable oil
  • 1 tablespoons of olive oil
  • 4 boneless skinless chicken breasts (about 1 1/4 lb)

Directions 

  1. In shallow bowl, mix crushed potato chips and seasonings. 
  2. In another shallow bowl, beat egg and Worcestershire sauce.
  3. In 10-inch nonstick skillet, heat oil over medium-low heat. 
  4. Dip chicken into egg mixture.
  5. Coat with potato chip mixture.
  6. Cook chicken in oil 10 to 12 minutes, turning once, until deep golden brown and juice of chicken is clear when center of thickest part is cut (170°F).

Yeild: 4 Servings
Print Friendly and PDF

Monday, March 17, 2014

When Irish Eyes Are Smiling

Happy St. Patrick's Day!  Fitting for today...it is also Corned Beef and Cabbage Day!

 Slow Cooker Corned Beef and Cabbage

Ingredients


  •     1 (4 - 5 pound) corned beef, soaked in water at least an hour and rinsed
  •     1 medium head of cabbage, cut into 2-inch wedges
  •     6 red potatoes, halved
  •     4 carrots, cut into ½-inch chunks
  •     1 teaspoon pickling spice
  •     2 cups low sodium chicken stock or water
  •     8 ounces beer (any unflavored kind will do; you can substitute water here, as well)
  •     3 large bay leaves
  •     1 tablespoon Dijon mustard
  •     1 teaspoon black pepper corns

Directions


  1.     Place carrots, and potatoes in the bottom of a large slow cooker pot.
  2.     Rinse the corned beef and lay it over the vegetables. 
  3.     Add in bay leaves, pepper corns, pickling spice, and Dijon mustard.
  4.     Pour beer and stock over everything. Make sure liquid covers most of the corned beef; if not, add more water or stock. 
  5.     Cover and cook on low setting for 8 hours.
  6.     Add the cabbage to the slow cooker and cook until cabbage is just tender (about 30 minutes).
  7.     Plate beef and veggies.
  8.     Slice beef against the grain and serve with extra mustard.
What better to go with corned beef...Irish Soda Bread!  A good sour dough bread goes well with this dish as well.


Irish Soda Bread


Ingredients


  •     4 to 4 1/2 cups flour
  •     2 Tbsp sugar
  •     1 teaspoon salt
  •     1 teaspoon baking soda
  •     4 Tbsp butter
  •     1 cup raisins - I personlly leave the rasins out
  •     1 large egg, lightly beaten
  •     1 3/4 cups buttermilk

Directions

  1.  Preheat oven to 425°. 
  2. Whisk together 4 cups of flour, the sugar, salt, and baking soda into a large mixing bowl.
  3.  Using your (clean) fingers (or two knives or a pastry cutter), work the butter into the flour mixture until it resembles coarse meal, then add in the raisins if you desire.
  4.  Make a well in the center of the flour mixture. 
  5. Add beaten egg and buttermilk to well and mix in with a wooden spoon until dough is too stiff to stir. 
  6. Dust hands with a little flour, then gently knead dough in the bowl just long enough to form a rough ball. If the dough is too sticky to work with, add in a little more flour. Do not over-knead! 
  7. Transfer dough to a lightly floured surface and shape into a round loaf. Note: The dough will be a little sticky, and quite shaggy. You want to work it just enough so that the flour is just moistened and the dough just barely comes together. Shaggy is good. If you over-knead, the bread will end up tough.
     
  8. Transfer dough to a large, lightly greased cast-iron skillet or a baking sheet (it will flatten out a bit in the pan or on the baking sheet). 
  9. Using a serrated knife, score top of dough about an inch and a half deep in an "X" shape. The purpose of the scoring is to help heat get into the center of the dough while it cooks. 
  10. Transfer to oven and bake until bread is golden and bottom sounds hollow when tapped, about 35-45 minutes. (If you use a cast iron pan, it may take a little longer as it takes longer for the pan to heat up than a baking sheet.) Check for doneness also by inserting a long, thin skewer into the center. If it comes out clean, it's done.   
  11. Remove pan or sheet from oven, let bread sit in the pan or on the sheet for 5-10 minutes, then remove to a rack to cool briefly. 
  12. Serve bread warm, at room temperature, or sliced and toasted. Best when eaten warm and just baked.

Hint 1: If the top is getting too dark while baking, tent the bread with some aluminum foil.

Hint 2: If you use a cast iron skillet to cook the bread in the oven, be very careful when you take the pan out. It's easy to forget that the handle is extremely hot. Cool the handle with an ice cube, or put a pot holder over it.


Print Friendly and PDF

Friday, March 14, 2014

3.14159265359 2014 Edition

Happy Pi Day! My favorite is to celebrate with an actual pie! I started celebrating Pi Day last year.  Enjoy this years pie winners for Pi!
Pi Day is an annual celebration commemorating the mathematical constant π (pi). Pi Day is observed on March 14 (or 3/14 in month/day date format), since 3, 1 and 4 are the three most significant digits of π in the decimal form. In 2009, the United States House of Representatives supported the designation of Pi Day.

J.J.'s Never Fail Freezable Pie Crust


 Ingredients

  •     1-1/2 cup vegetable Shortening
  •     3 cups All-purpose Flour
  •     1 whole Egg
  •     5 Tablespoons Cold Water
  •     1 Tablespoon White Vinegar
  •     1 teaspoon Salt

Directions


  1. In a large bowl, with a pastry cutter, gradually work the shortening into the flour for about 3 or
    A pastry cutter looks something like this.
    4 minutes until it resembles a coarse meal. In a small bowl, beat an egg with a fork and then pour it into the flour/shortening mixture. Add 5 tablespoons of cold water, 1 tablespoon of white vinegar and 1 teaspoon of salt. Stir together gently until all of the ingredients are incorporated.
  2. Separate the dough into thirds. Note: Separating it into thirds will result in three thin crusts. If you prefer a more substantial crust, separate it in half. 
  3. Form 3 evenly sized balls of dough and place each dough into a large Ziploc bag. 
  4. Using a rolling pin, slightly flatten each ball of dough (about ½ inch thick) to make rolling easier later. Seal the bags and place them in the freezer until you need them. (If you will be using it immediately it’s still a good idea to put in the freezer for about 15 to 20 minutes to chill.)
  5. When you are ready to use the dough to make a crust, remove from the freezer and allow to thaw for 15 minutes. 
  6. On a floured surface roll the dough, starting at the center and working your way out. (Sprinkle some flour over top of the dough if it’s a bit too moist.) If the dough is sticking to the countertop use a metal spatula and carefully scrape it up and flip it over and continue rolling until it’s about ½ inch larger in diameter than your pie pan.
  7. With a spatula, lift the dough carefully from the surface of the counter into the pie pan. Gently press the dough against the corner of the pan. 
  8. Go around the pie pan pinching and tucking the dough to make a clean edge.

Rosy's Family Pie Crust

Ingredients

  • 1 cup flour
  • 5 1/3 tablespoon salted butter or margerine 
  • pinch of salt
  • cold water

Directions

  1. Mix flour and salt
  2. Cut in butter until it's about cornmeal consistency
  3. Add 3 tablespoons of water and cut in
  4. Then add water by the teaspoon until dough consistency
  5. Chill slightly before rolling out and using

Derby Pie


Ingredients

  • 4 large eggs, lightly beaten
  • 2 cups sugar
  • 1 (12-ounce) package semisweet chocolate morsels
  • 1 cup self-rising flour
  • 1 cup (2 sticks) butter, melted
  • 2 teaspoons vanilla extract
  • 2 cups chopped pecans
  • 2 (9-inch) deep dish unbaked pie shells or 3 (9-inch) unbaked regular pie shells
  • Ice cream, optional

Directions

  1. Preheat oven to 350 degrees F.
  2. Combine eggs and  sugar in large bowl. 
  3. Add flour and mix well, 
  4. Stir in remaining ingredients 
  5. Pour into pie shells
  6. Bake 50 to 60 minutes.
  7. Serve warm with ice cream. Freezes well!!
Yeild: 2/3 pies

Pumpkin Pie


Ingredients

  • 3/4 cup granulated sugar
  • 1 teaspoon ground cinnamon
  • 1/2 teaspoon salt
  • 1/2 teaspoon ground ginger
  • 1/4 teaspoon ground cloves
  • (or 1 1/2  teaspoon pumpkin pie spice)
  • 2 large eggs
  • 1 can (15 oz.) Pumpkin
  • 1 can (12 fl. oz.) Evaporated Milk
  • 1 unbaked 9-inch (4-cup volume) deep-dish pie shell or Rosy's Pie Crust
  • Whipped cream (optional)

Directions

  1. MIX sugar, cinnamon, salt, ginger and cloves in small bowl. Beat eggs in large bowl. Stir in pumpkin and sugar-spice mixture. Gradually stir in evaporated milk.
  2.  POUR into pie shell.
  3.  BAKE in preheated 425° F oven for 15 minutes. Reduce temperature to 350° F; bake for 40 to 50 minutes or until knife inserted near center comes out clean. Cool on wire rack for 2 hours. Serve immediately or refrigerate. Top with whipped cream before serving.
Print Friendly and PDF

Monday, March 10, 2014

Have a cupcake and drink it too!

Today is National Blueberry Popover Day!

In today's issue...

  • Blueberry Popovers
  • Vodka!

 Blueberry Popovers

In honor of today being national blueberry popover day!

Ingredients

  • 3 tablespoons butter, cut into 6 equal-sized pieces
  • 1 cup whole milk
  • 3 eggs, beaten
  • 1/4 cup white sugar
  • 1 teaspoon vanilla extract or you could use blueberry vodka!
  • 1 cup all-purpose flour
  • 1/2 cup fresh blueberries
  • 1 tablespoon white sugar
  • 1 teaspoon ground cinnamon
  • 1/4 cup confectioners' sugar, or to taste
  • 1 lemon, halved

Directions

  1.     Preheat oven to 375 degrees F (190 degrees C).
  2.    Put a piece of butter into each of 6 large muffin cups.
  3.      Put muffin tin in preheated oven until butter melts, about 5 minutes. Set aside.
  4.      Beat milk, eggs, 1/4 cup sugar, and vanilla together in a large bowl. Whisk flour into the milk mixture until you have a batter. Divide batter between muffin cups. Drop even amounts of blueberries into each batter portion. Stir 1 tablespoon sugar and cinnamon together in a small bowl; sprinkle evenly over the batter portions.
  5.   Bake in preheated oven for 5 minutes. Reduce heat to 350 degrees F (175 degrees C) and continue baking until popovers are no longer moist in the center, about 25 minutes. Dust tops of popovers with confectioners' sugar. Squeeze lemon juice over popovers. Serve warm.

 Yield: 6


I remember ages (and I do mean ages) ago when I turned 21 there was one type of vodka or one type I knew about...the plain old kind.   Then around 1999 Absolut came out with Mandrin and it just exploded from there. I wasn't much interested in flavored vodkas until I was introduced the the adult cherry Coke made with cherry flavored vodka or the delicious cotton candy vodka by Pinnacle.  

Cupcake Martini

Ingredients

  • 1 1/2oz Cake Vodka
  • 1 1/2oz Whipped Cream Vodka
  • 1 1/2oz White Creme de Cacao
  • 1/2oz Amaretto 
  • 1/2oz White Chocolate Liqueur
  • 1oz Heavy Whipping Cream
  • Ice
  • White Icing
  • Sprinkles

Directions

  1. Place ice in martini glasses to chill the glass.
  2. Place sprinkles on a shallow plate that is a little larger than the mouth of your martini glass.
  3. In another shallow plate, cover bottom with white icing.
  4. Dump ice out of glass.
  5. Dip the rim of the martini glass in icing.
  6. Dip glass into sprinkles to rim the edges.
  7. Combine remaining ingredients in a cocktail shaker with ice and shake for about 30 seconds.
  8. Strain into martini glasses and drink!

Make ahead: For a big party, mix up a big batch of these and store in a large pitcher in the fridge. Shake a glass at a time over ice whenever ready to serve!

Adult Cherry Coke 

  Ingredients

  • 1 1/2oz  Cherry Vodka
  • 3 floz Cola
  • 1/2oz Grenadine 
  • Maraschino Cherries
Directions
  1.   Fill glass with ice. 
  2. Add Cherry Vodka, cola, and grenadine. 
  3. Stir well. 
  4. Garnish with cherry.
Print Friendly and PDF